Deploy Microservices on Google Kubernetes Engine in 8 Easy steps. Hands on tutorial on app containerization and running containers in Google cloud kubernetes Engine.
Prerequisites:
Google cloud free trial account. Refer our article Google Cloud Free Credits – Google Cloud Tutorials .
This tutorial would be Handson demo and you can follow along.
Package a web application into a Docker image.
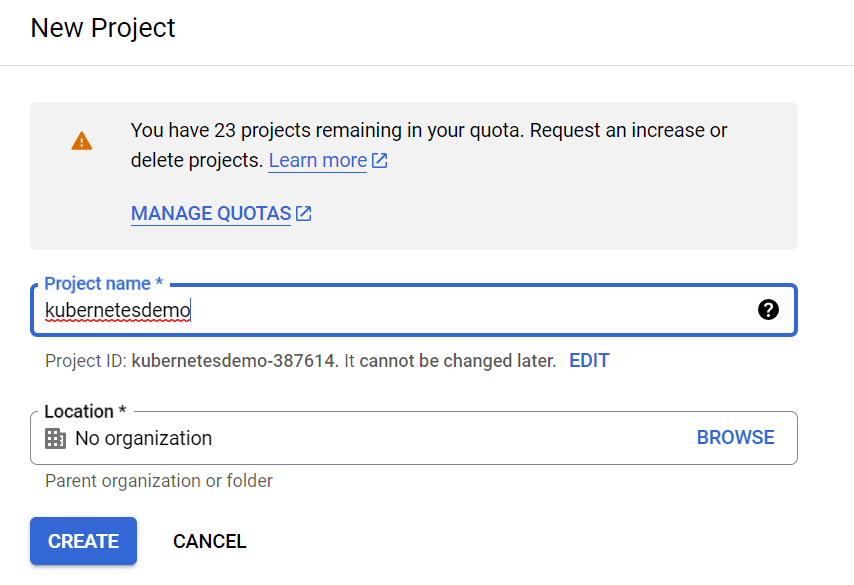
1.In the Google Cloud console, on the project selector page, select or create a new project.
Note: The free trial account has limited credits worth 300 $. In order to use it most effectively and to avoid wastage of cloud resources it is always best option create new project in GCP to learn and explore cloud services. Once your POC demo is completed you can delete this project and all the resources associated with this project would be deleted and no future costs would be incurred.
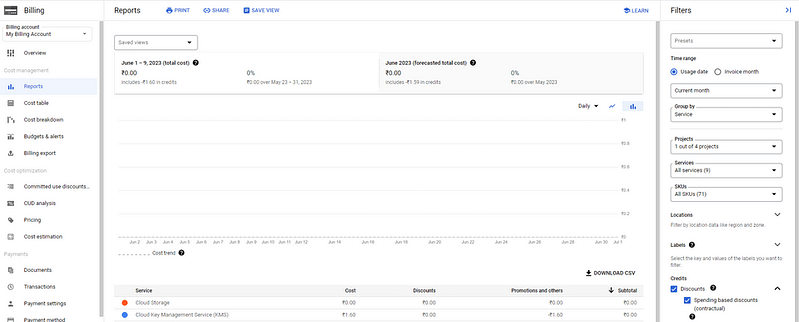
2. Check if billing is enabled for this project. In google cloud console search for “billing account” and navigate through Reports.
3.Activate Artifact Registry API
4.Activate Google Kubernetes Engine API
Activate Cloud Shell
Cloud Shell is development and operations environment offered by Google Cloud platform.
It comes preloaded with gcloud, docker, and kubectl command-line tools and more.
This can be used to develop,build,debug and deploy your cloud-based apps using online cloud shell editor and terminal.
In Google cloud console search “Cloud shell” and navigate to cloud shell editor.
Click on Activate Cloud Shell button at the top of the Google Cloud console window.
Create empty .NET 6 project using CLI command.
dotnet new mvc --framework "net6.0" -o containerdemoPublish the .NET application using below CLI command
dotnet publish -c ReleaseSet up the Docker file
In google Cloud shell editor under project explorer view locate your project.
All projects created using cloud shell are visible in project explorer view.
Add a new file at project level and name it as “Dockerfile” . Copy and paste below code and click on save file.
FROM mcr.microsoft.com/dotnet/aspnet:6.0 AS base
WORKDIR /app
EXPOSE 8080
ENV ASPNETCORE_URLS=http://*:8080

FROM mcr.microsoft.com/dotnet/sdk:6.0 AS build
WORKDIR /src
COPY ["containerdemo.csproj", "."]
RUN dotnet restore "./containerdemo.csproj"
COPY . .
WORKDIR "/src/."
RUN dotnet build "containerdemo.csproj" -c Release -o /app/build

FROM build AS publish
RUN dotnet publish "containerdemo.csproj" -c Release -o /app/publish

FROM base AS final
WORKDIR /app
COPY --from=publish /app/publish .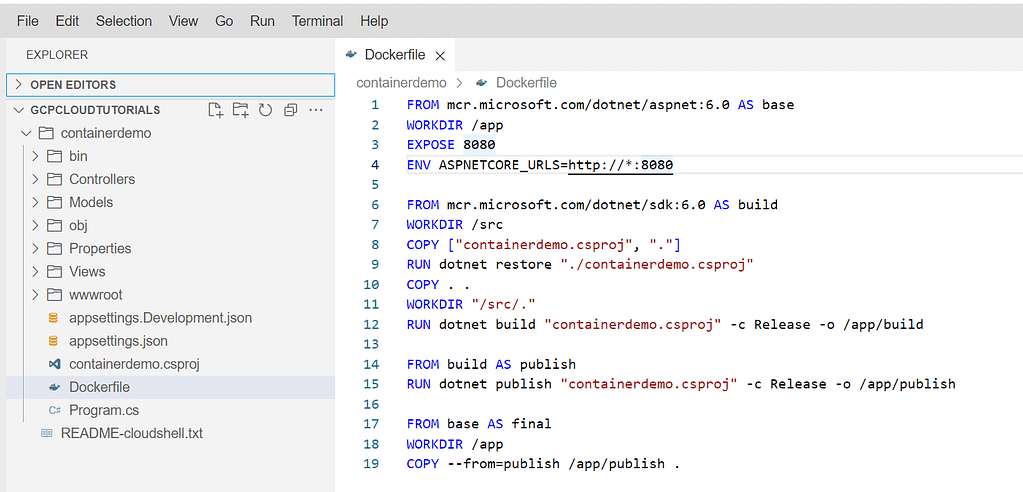
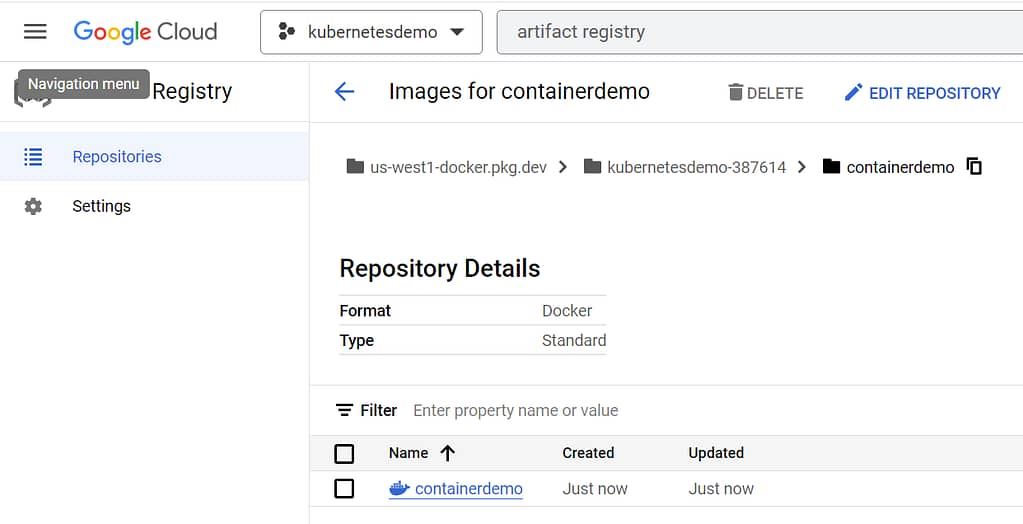
Create Artifactory repository
In this tutorial, you store an image in Artifact Registry and deploy it from the registry.
Set your projectID for the Google Cloud CLI:
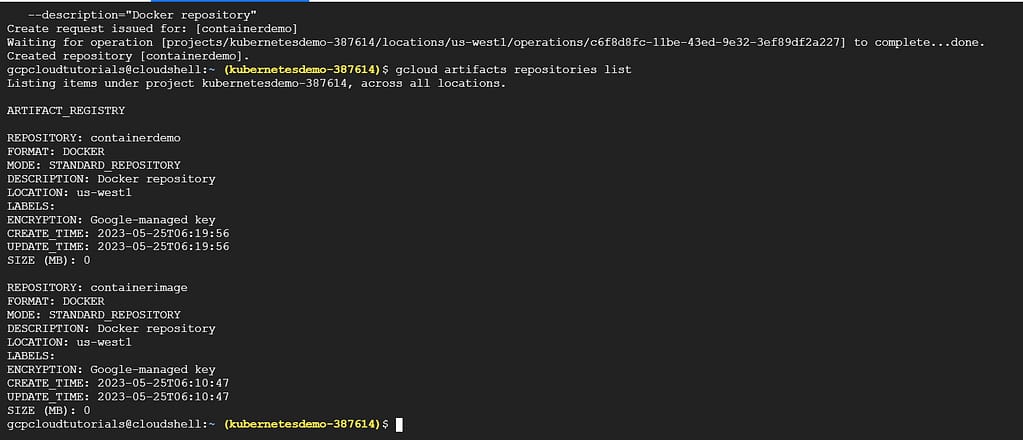
gcloud config set project $PROJECT_IDCreate the containerdemo repository with the following command:
gcloud artifacts repositories create hello-repo \
   --repository-format=docker \
   --location= \
   --description="Docker repository"
Replace REGION with a region for the repository,
Building the container image
The Dockerfile file is used by the docker build command to create a container image. Docker file is a plain text file, and it doesn’t have any extension.
Custom image for your application is built on top of base image available in official repository like Docker Hub.
The FROM keyword requires a fully qualified Docker container image name.
The Microsoft Container Registry hosts publicly accessible containers. The “dotnet” in the image url is container repository and “sdk” is container image name. This image is based on version 6.0 of the official ASP.NET Core Docker image and it is use as base image.
Make sure to pull the correct version as per your targeted framework version.
Build and tag the Docker image.
docker build -t us-west1-docker.pkg.dev/kubernetesdemo-387614/containerdemo/containerdemo:v1 .This command is use by Docker to build the image using Dockerfile and save it to local environment.
Once image build is successful than it is tag it with a name, such as us-west1-docker.pkg.dev/kubernetesdemo-387614/containerdemo/containerdemo:v1 . using the same command in single step.
The PROJECT_ID variable associates the container image with the containerdemo project repository.
The us-west1-docker.pkg.dev prefix refers to Artifact Registry, regional host for your project repository.
run the below command to check list of all locally available images.
docker images
Add IAM policy bindings to your service account:
gcloud artifacts repositories add-iam-policy-binding containerdemo\
    --location=REGION \
    --member=serviceAccount:[email protected] \
    --role="roles/artifactregistry.reader"
gcloud artifacts repositories add-iam-policy-binding containerdemo \
--location=us-west1\
--member=serviceAccount:[email protected] \
--role="roles/artifactregistry.reader"Pushing the Docker image to Artifact Registry
To run container images in Google kubernetes cluster it must be uploaded to registry. Google Artifact registry is used store your container images.
Google Container registry has been deprecated on 15 May 2023 and replaced by Artifact registry.
Configure the Docker command-line tool to authenticate to Artifact Registry.
gcloud auth configure-docker REGION-docker.pkg.devPush the Docker image that you just built to the repository:
docker push REGION-docker.pkg.dev/${PROJECT_ID}/containerdemo/containerdemo:v1
Check if container image exist in Artifactory registry.
Create a GKE cluster Set up using cloud console
Docker image for custom application is stored in artifact registry. Next step is to create a new GKE cluster to run containerdemo app.
Search for Google Kubernetes Engine and click on create. It will open cluster creation pop up.
Auto pilot is the new mode of operation supported by Google Cloud platform. In auto pilot mode the responsibility of cluster and node management is delegated to GKE.
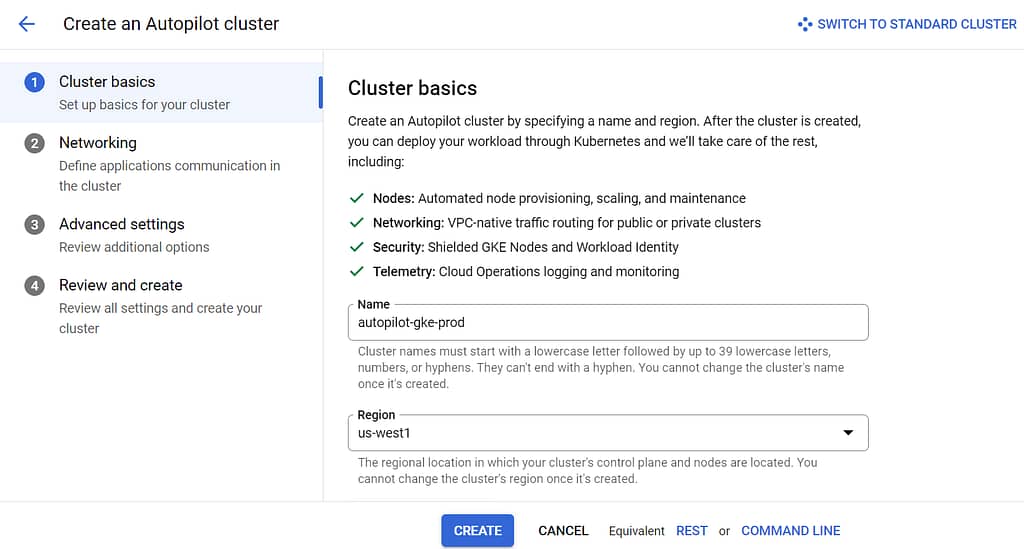
click on create-to-create cluster with default configuration.
If you like to learn more on GKE cluster set up and configuration refer our article on Easily Set Up Google Cloud Kubernetes Cluster Standard Mode In 10 Minutes – Google Cloud Tutorials .
Deploy Microservices on Google Kubernetes Engine
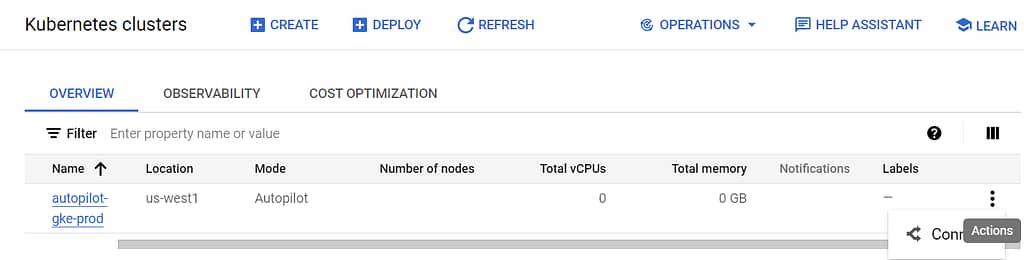
You are now ready to run your microservice as containers in GKE.
In cloud console search for “Kubernetes” and navigate to Kubernetes dashboard page and click on Connect to get Command line access for gke connection.
1.Ensure that you are connected to your GKE cluster.
gcloud container clusters get-credentials autopilot-gke-prod --region us-west1 --project kubernetesdemo-3876142.Create a Kubernetes Deployment for your containerdemo Docker image.
kubectl create deployment containerdemo --image=us-west1-docker.pkg.dev/kubernetesdemo-387614/containerdemo/containerdemo:v13.Set the baseline number of Deployment replicas to 2.
kubectl scale deployment containerdemo --replicas=24.Create a HorizontalPodAutoscaler resource for your Deployment.
kubectl autoscale deployment containerdemo --cpu-percent=80 --min=1 --max=55.To see the Pods created, run the following command:
kubectl get pods
Exposing the application to the internet
While Pods do have individual IP address, those IPs can only be reached from inside your cluster.
Kubernetes services are used to expose applications to external world.
- Use the
kubectl exposecommand to generate a Kubernetes Service for the containerdemo deployment:
kubectl expose deployment containerdemo --name=containerdemo-service --type=LoadBalancer --port 80 --target-port 80802.Run the following command to get the Service details for container-service:
kubectl get service
Copy the EXTERNAL_IP address in the browser.
Clean up Resources
To avoid incurring charges to your Google Cloud account for the resources used in this tutorial, either delete the project that contains the resources, or keep the project and delete the individual resources.
Detailed GKE pricing can be found here Google Cloud Pricing Calculator.